Amazon S3
ToolJet can connect to Amazon S3 buckets and perform various operation on them.
Connection
To add a new S3 source, go to the Datasources manager on the left sidebar of the app editor and click on Add datasource button. Select AWS S3 from the modal that pops up.
ToolJet requires the following to connect to your AWS S3:
- Region
- Access key
- Secret key
It is recommended to create a new IAM user for the database so that you can control the access levels of ToolJet.
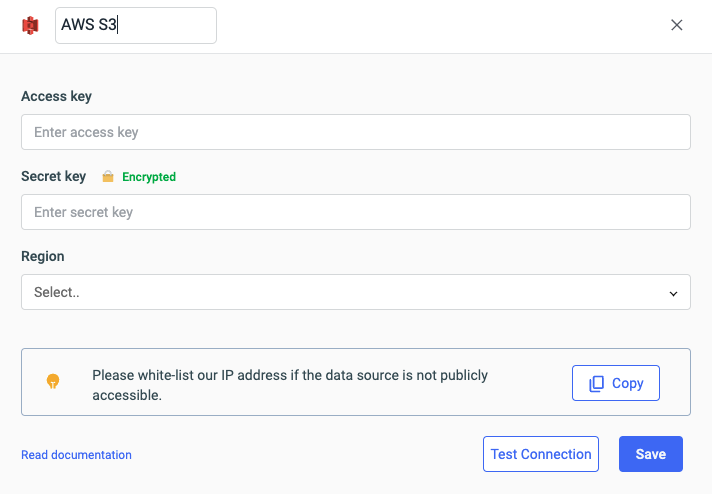
Click on Test connection button to verify if the credentials are correct and that the database is accessible to ToolJet server. Click on Save button to save the data source.
Querying AWS S3
Click on + button of the query manager at the bottom panel of the editor and select the data source added in the previous step as the data source. Select the operation that you want to perform and click Save to save the query.
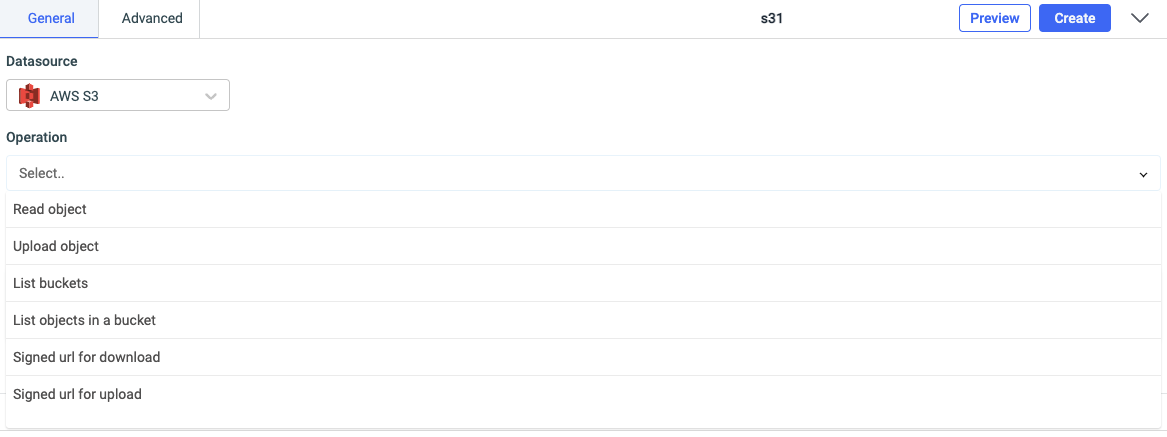
Click on the run button to run the query.
NOTE: Query should be saved before running.
Query results can be transformed using transformations. Read our transformations documentation to see how: link
Query operations
You can create query for AWS S3 data source to perform several actions such as:
- Read object
- Upload object
- List buckets
- List objects in a bucket
- Signed url for download
- Signed url for upload
Read object
You can read an object in a bucket by using this operation. It requires two parameters - Bucket name and Key.

Upload object
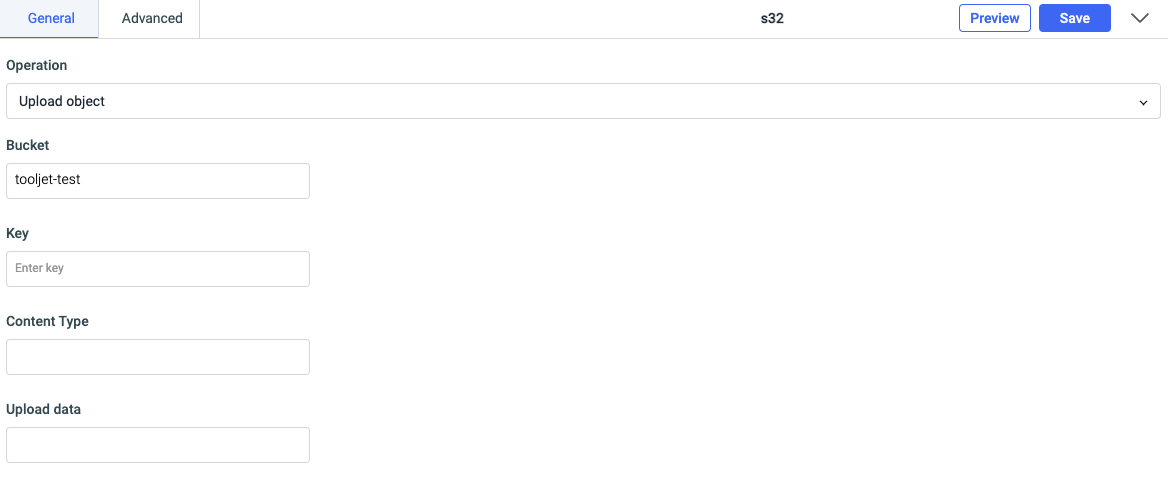
You can use this operation to upload objects(files) to your S3 bucket. It requires four parameters:
- Bucket: Specify the bucket name
- Key: Key of the object/file
- Content type: Specify file type such as text, image etc.
- Upload data: File/object that is to be uploaded.
List buckets
This operation will list all the buckets in your S3. This does not require any parameter.

List objects in a bucket
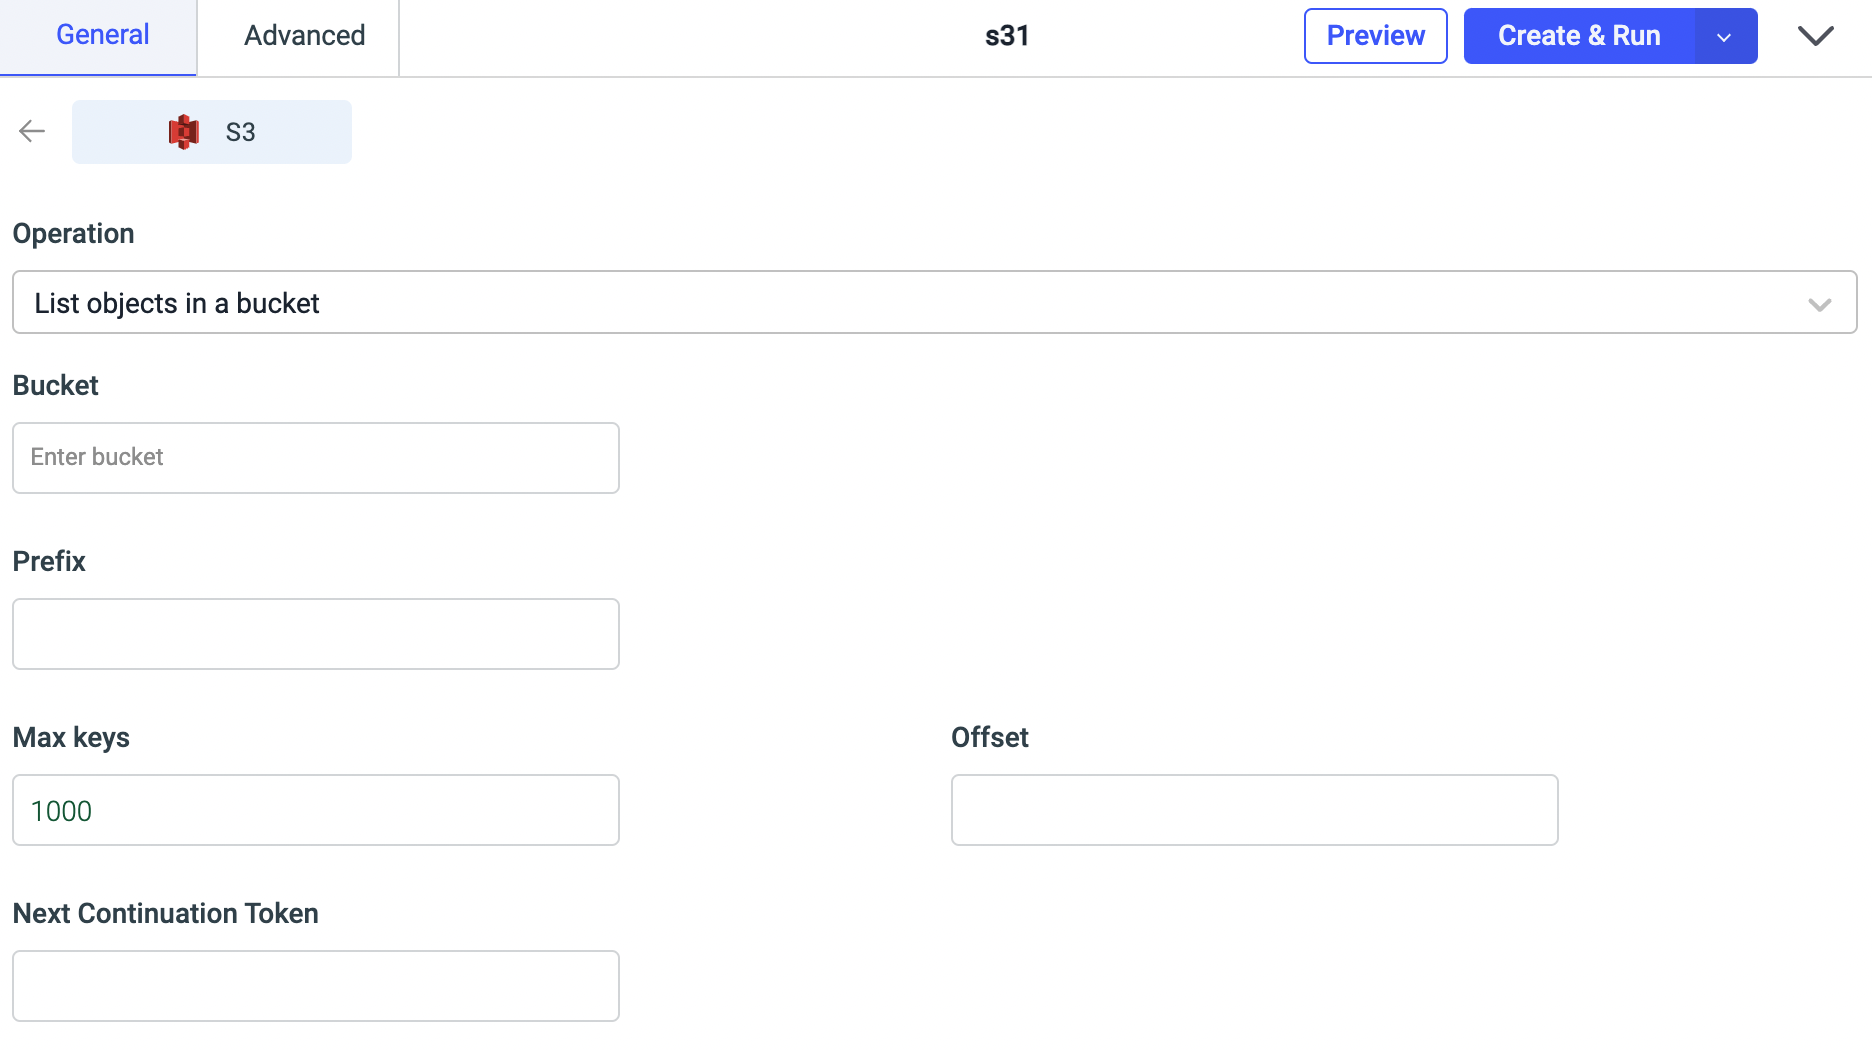
This operation will fetch the list of all the files in your bucket. It requires two parameters:
- Bucket: Bucket name (mandatory)
- Prefix: To limit the response to keys that begin with the specified prefix (optional)
- Max keys: The maximum number of keys returned in the response body (optional). Default value is 1000.
- Offset: The key to start with when listing objects in a bucket (optional).
- "Next Continuation Token":
Next Continuation Tokenindicates Amazon S3 that the list is being continued on this bucket with a token. ContinuationToken is obfuscated and is not a real key (optional).
Next Continuation Token
For listing a bucket for objects that begin with a specific character or a prefix, then use the Offset parameter. For example, if you want to list all the objects that begin with a, then set the Offset parameter to a. Similarly, if you want to list all the objects that begin with ab, then set the Offset parameter to ab.
The Next Continuation Token is used to list the next set of objects in a bucket. It is returned by the API when the response is truncated. The results will contain Next Continuation Token if there are more keys in the bucket that satisfy the list query. To get the next set of objects, set the Next Continuation Token parameter and run the query again.
The results will continue from where the last listing finished.
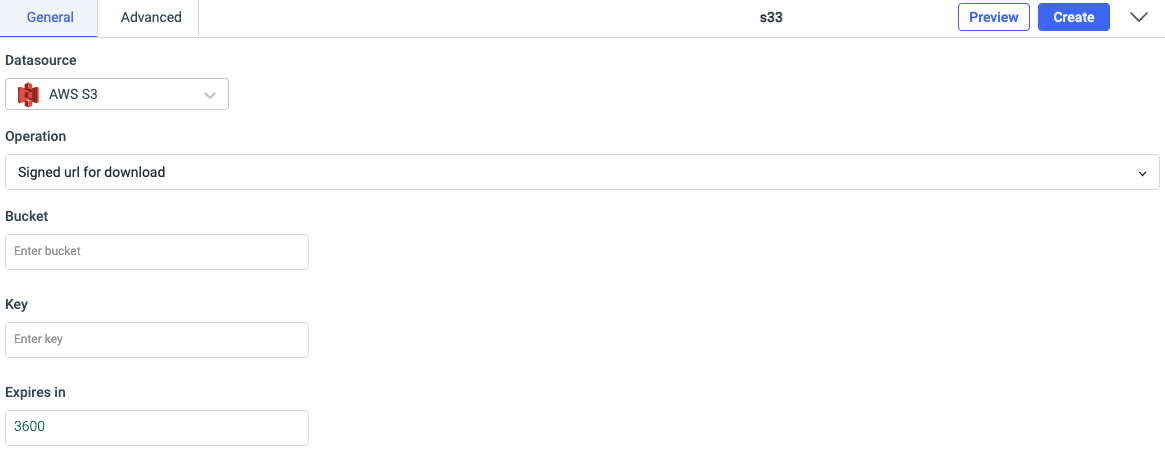
Signed url for download
The object owner can optionally share objects with others by creating a presigned URL, using their own security credentials, to grant time-limited permission to download the objects. For creating a presigned URL, the required parameters are:
- Bucket: name of the bucket for uploading the file
- Key: an object key
- Expires in: an expiration time of URL
Signed url for upload
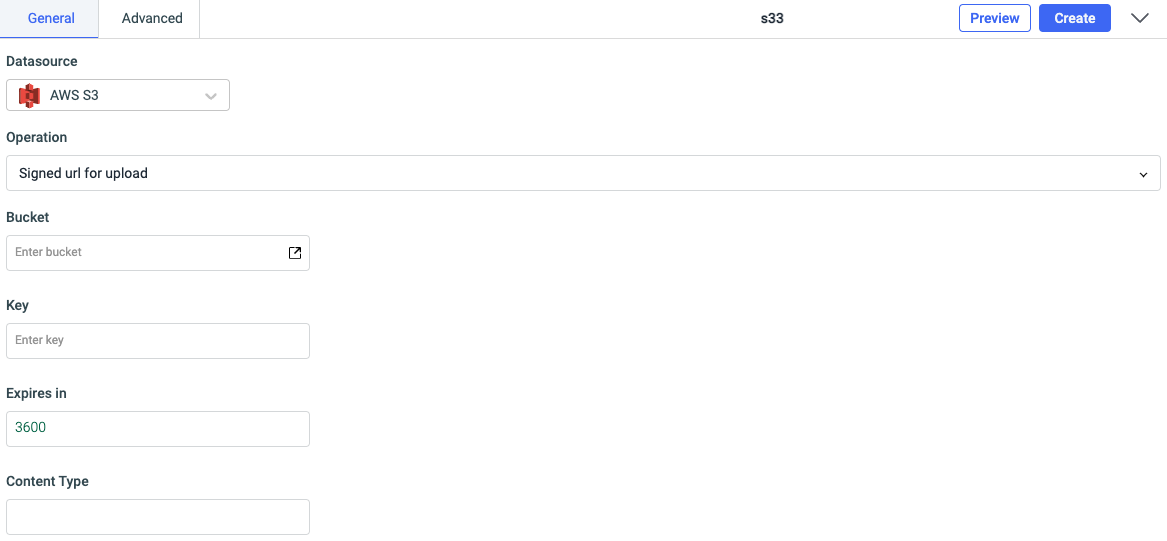
The presigned URLs are useful if you want your user/customer to be able to upload a specific object to your bucket, but you don't require them to have AWS security credentials or permissions. For creating a presigned URL, the required parameters are:
- Bucket: name of the bucket for uploading the file
- Key: an object key
- Expires in: an expiration time of URL
- Content type: the content type such as text, image etc.
We built an app to view and upload files to AWS S3 buckets. Check out the complete tutorial here.